

Chapter 8
Publishing and deploying
Publishing creates a numbered release from the saved draft. Deploying makes that release available on a channel.
Publish a release
- Wait for the Saved status in the top bar.
- Select Validate and resolve every issue.
- Test the changed paths and their failure routes.
- Select Publish. The draft becomes the live version at once.
- Open Releases and confirm the new version.
Release history
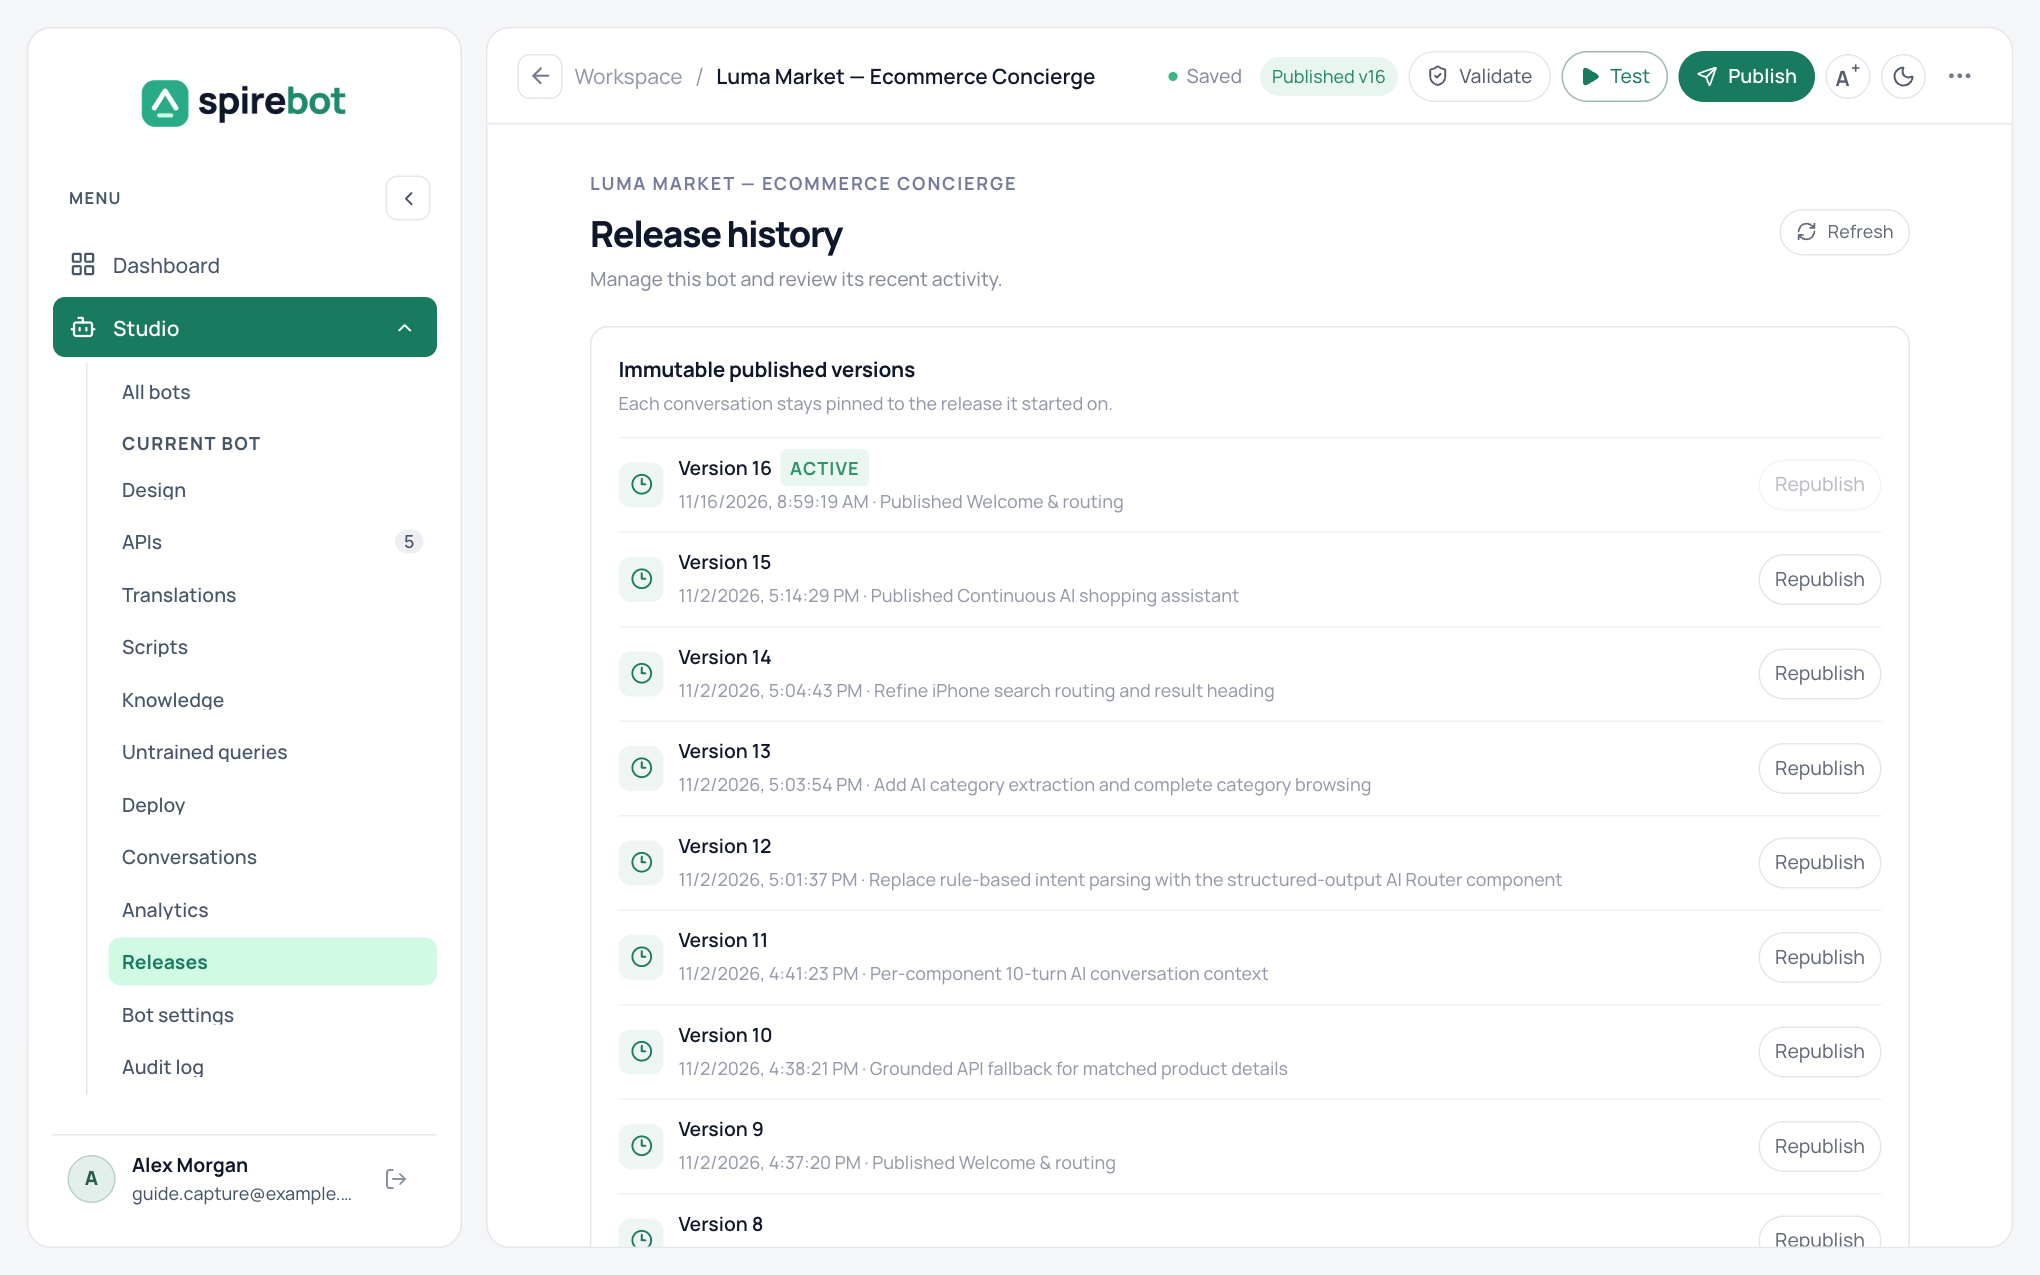
Releases lists every published version with its date and note. The live version is marked Active. Each conversation stays on the version it started with. To return to an earlier version, select Republish beside it.
Deploy to web chat
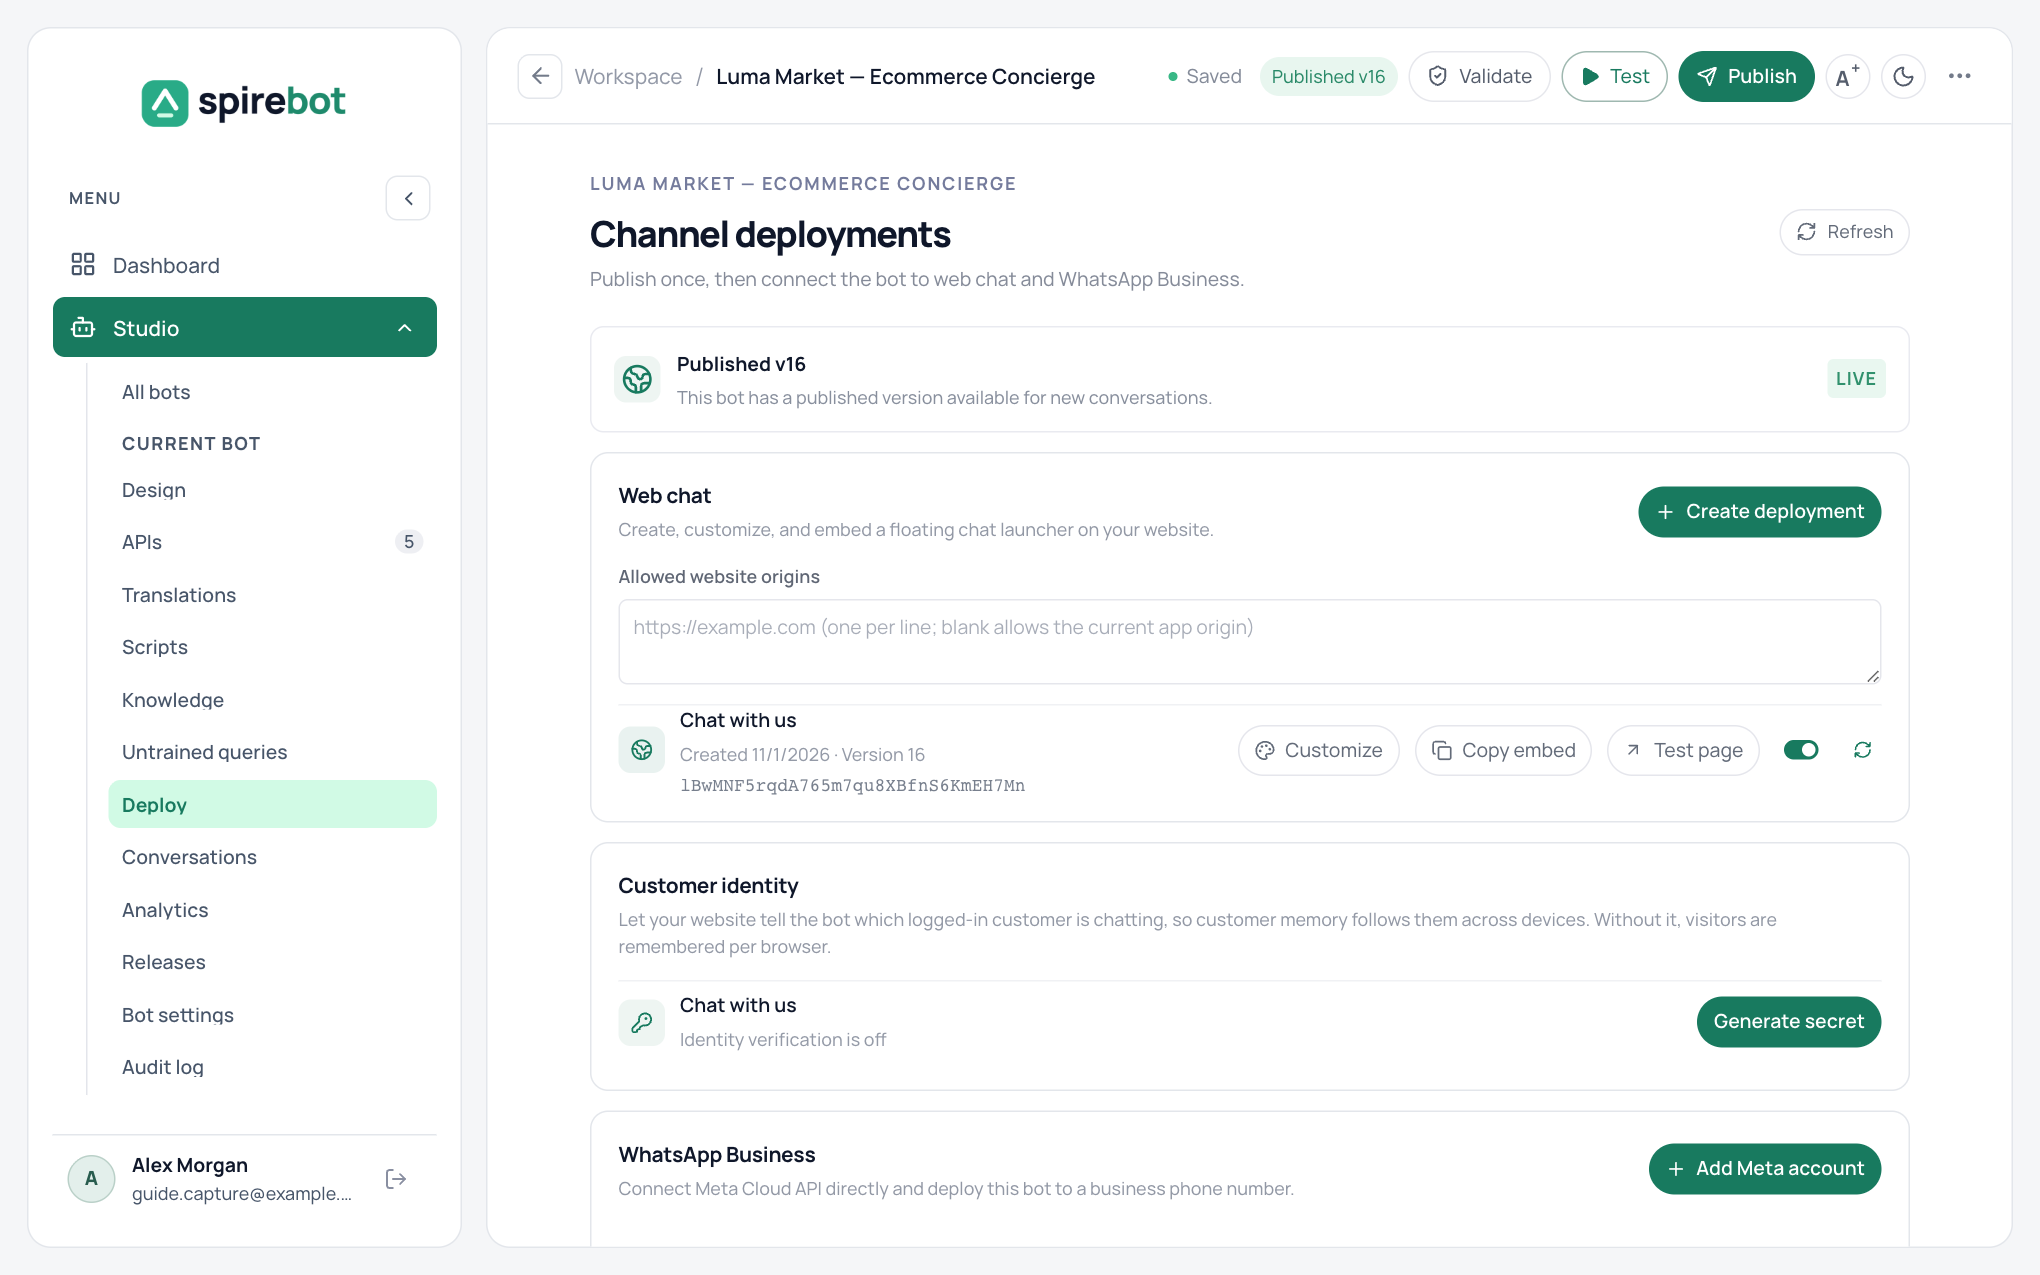
- Open Deploy in the bot menu.
- Under Allowed website origins, enter the addresses of the websites that may show the widget, one per line.
- Select Create deployment.
- Select Copy embed and add the script to your website.
- Select Test page to try the widget on a sample page.
Use the switch on a deployment to turn it on or off.
Design the web widget
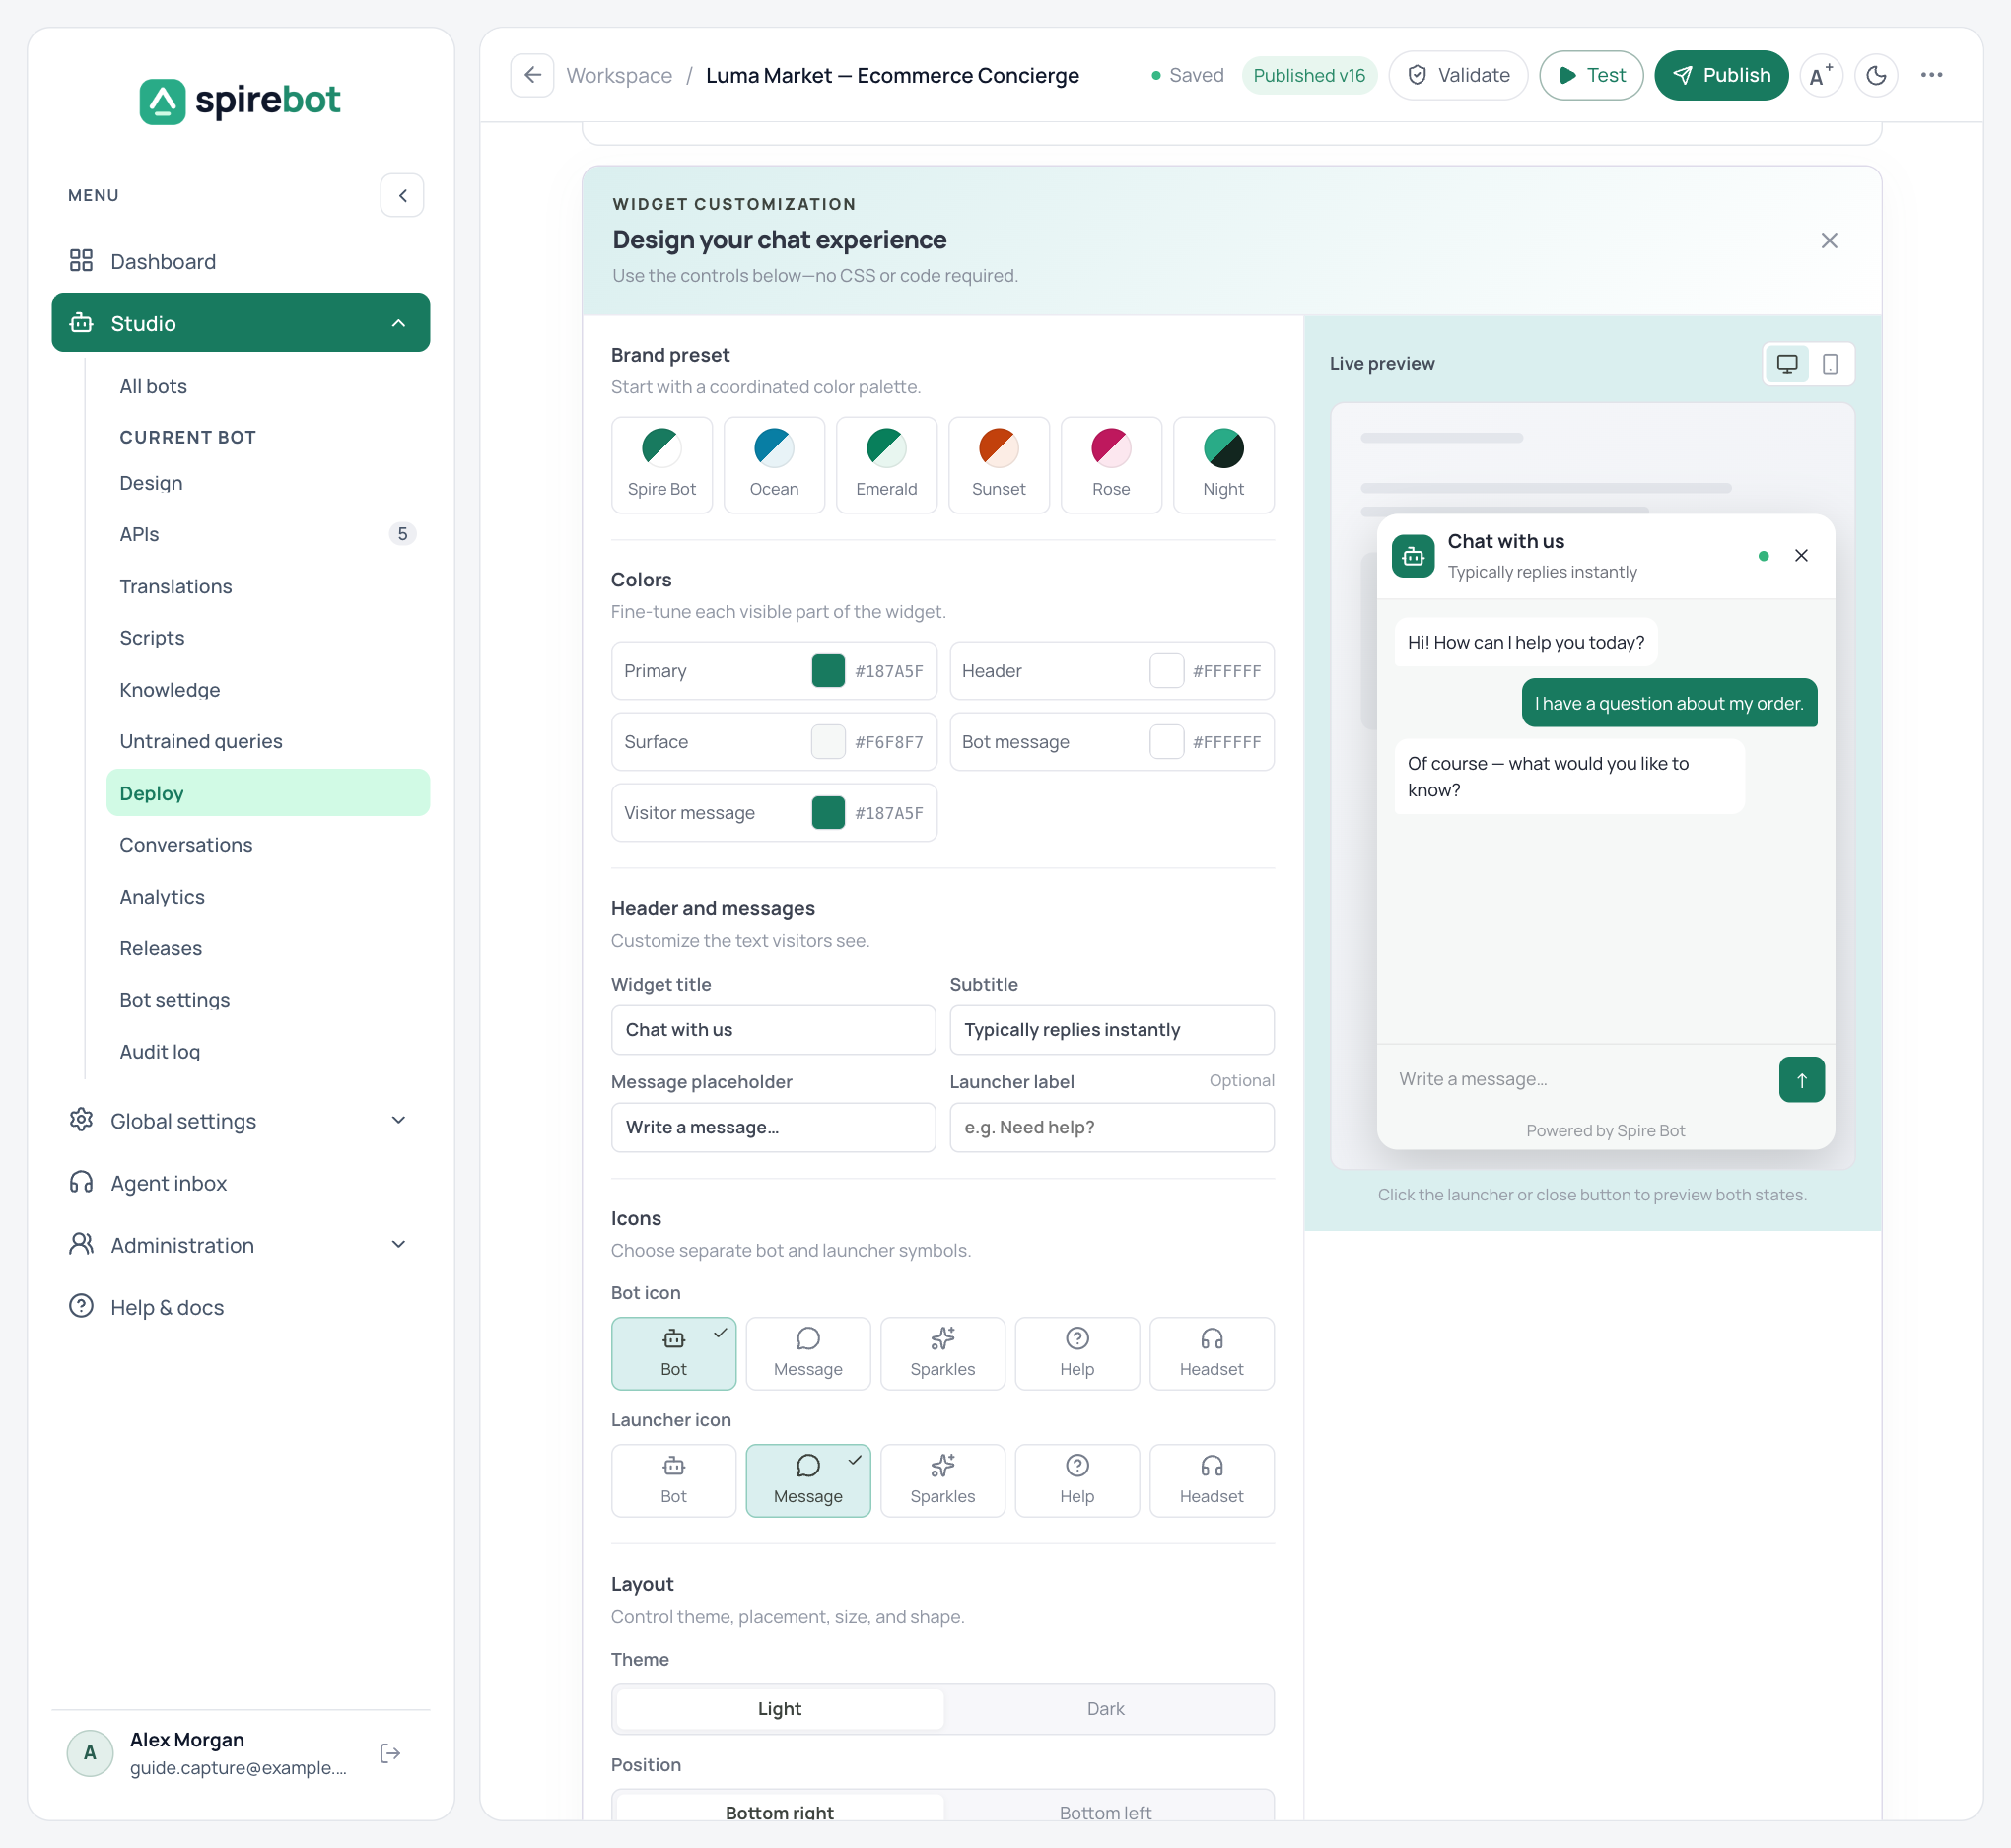
Select Customize on a web deployment. No CSS or code is needed, and the live preview updates as you work.
| Section | Options |
|---|---|
| Brand preset | A coordinated palette: Spire Bot, Ocean, Emerald, Sunset, Rose, or Night. |
| Colors | Primary, Header, Surface, Bot message, and Visitor message. |
| Header and messages | Widget title, subtitle, message placeholder, and an optional launcher label. |
| Icons | Separate symbols for the bot and the launcher. |
| Layout | Light or dark theme, position at the bottom right or bottom left, size, and shape. |
Customer identity
By default, web visitors are remembered per browser. To let customer memory follow a signed-in customer across devices, select Generate secret under Customer identity and have your website pass a signed customer ID to the widget.
Deploy to WhatsApp Business
Under WhatsApp Business, select Add Meta account to connect your Meta account, then choose the business phone number to deploy to. Confirm templates, media, catalog assets, and channel limits before you publish.
After every release
- Run a live test from the real channel: the start, one core outcome, one failure path, and a handover.
- Watch the first conversations and failures closely.
- Keep the previous version available so you can republish it if needed.