
Chapter 5
Content and data
Connect the bot to your systems and documents, and prepare its content for every language you serve.
API connections
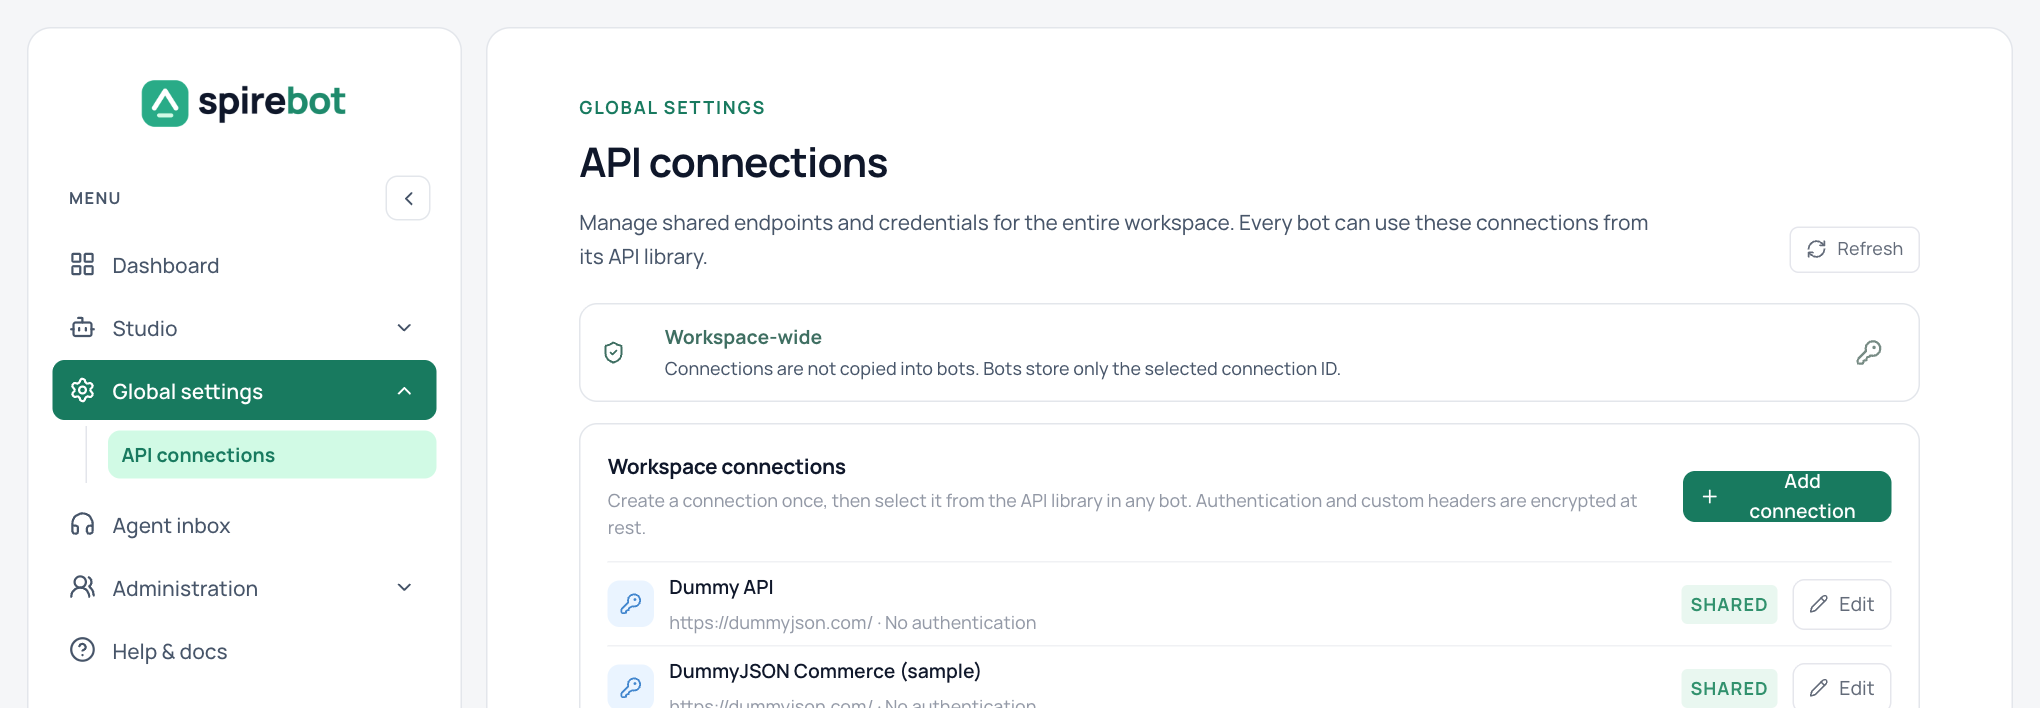
A connection stores the base URL and credentials for one external service. Connections belong to the workspace, so every bot can use them, and credentials are never copied into a bot.
- Open Global settings → API connections.
- Select Add connection.
- Enter the name, base URL, and authentication details, then save.
- Use the narrowest base URL and the minimum permissions the bot needs.
- Authentication and custom headers are encrypted when stored.
- Select Edit to change a connection.
Connections are managed by API Integrators and Administrators. Other roles do not see Global settings.
API library
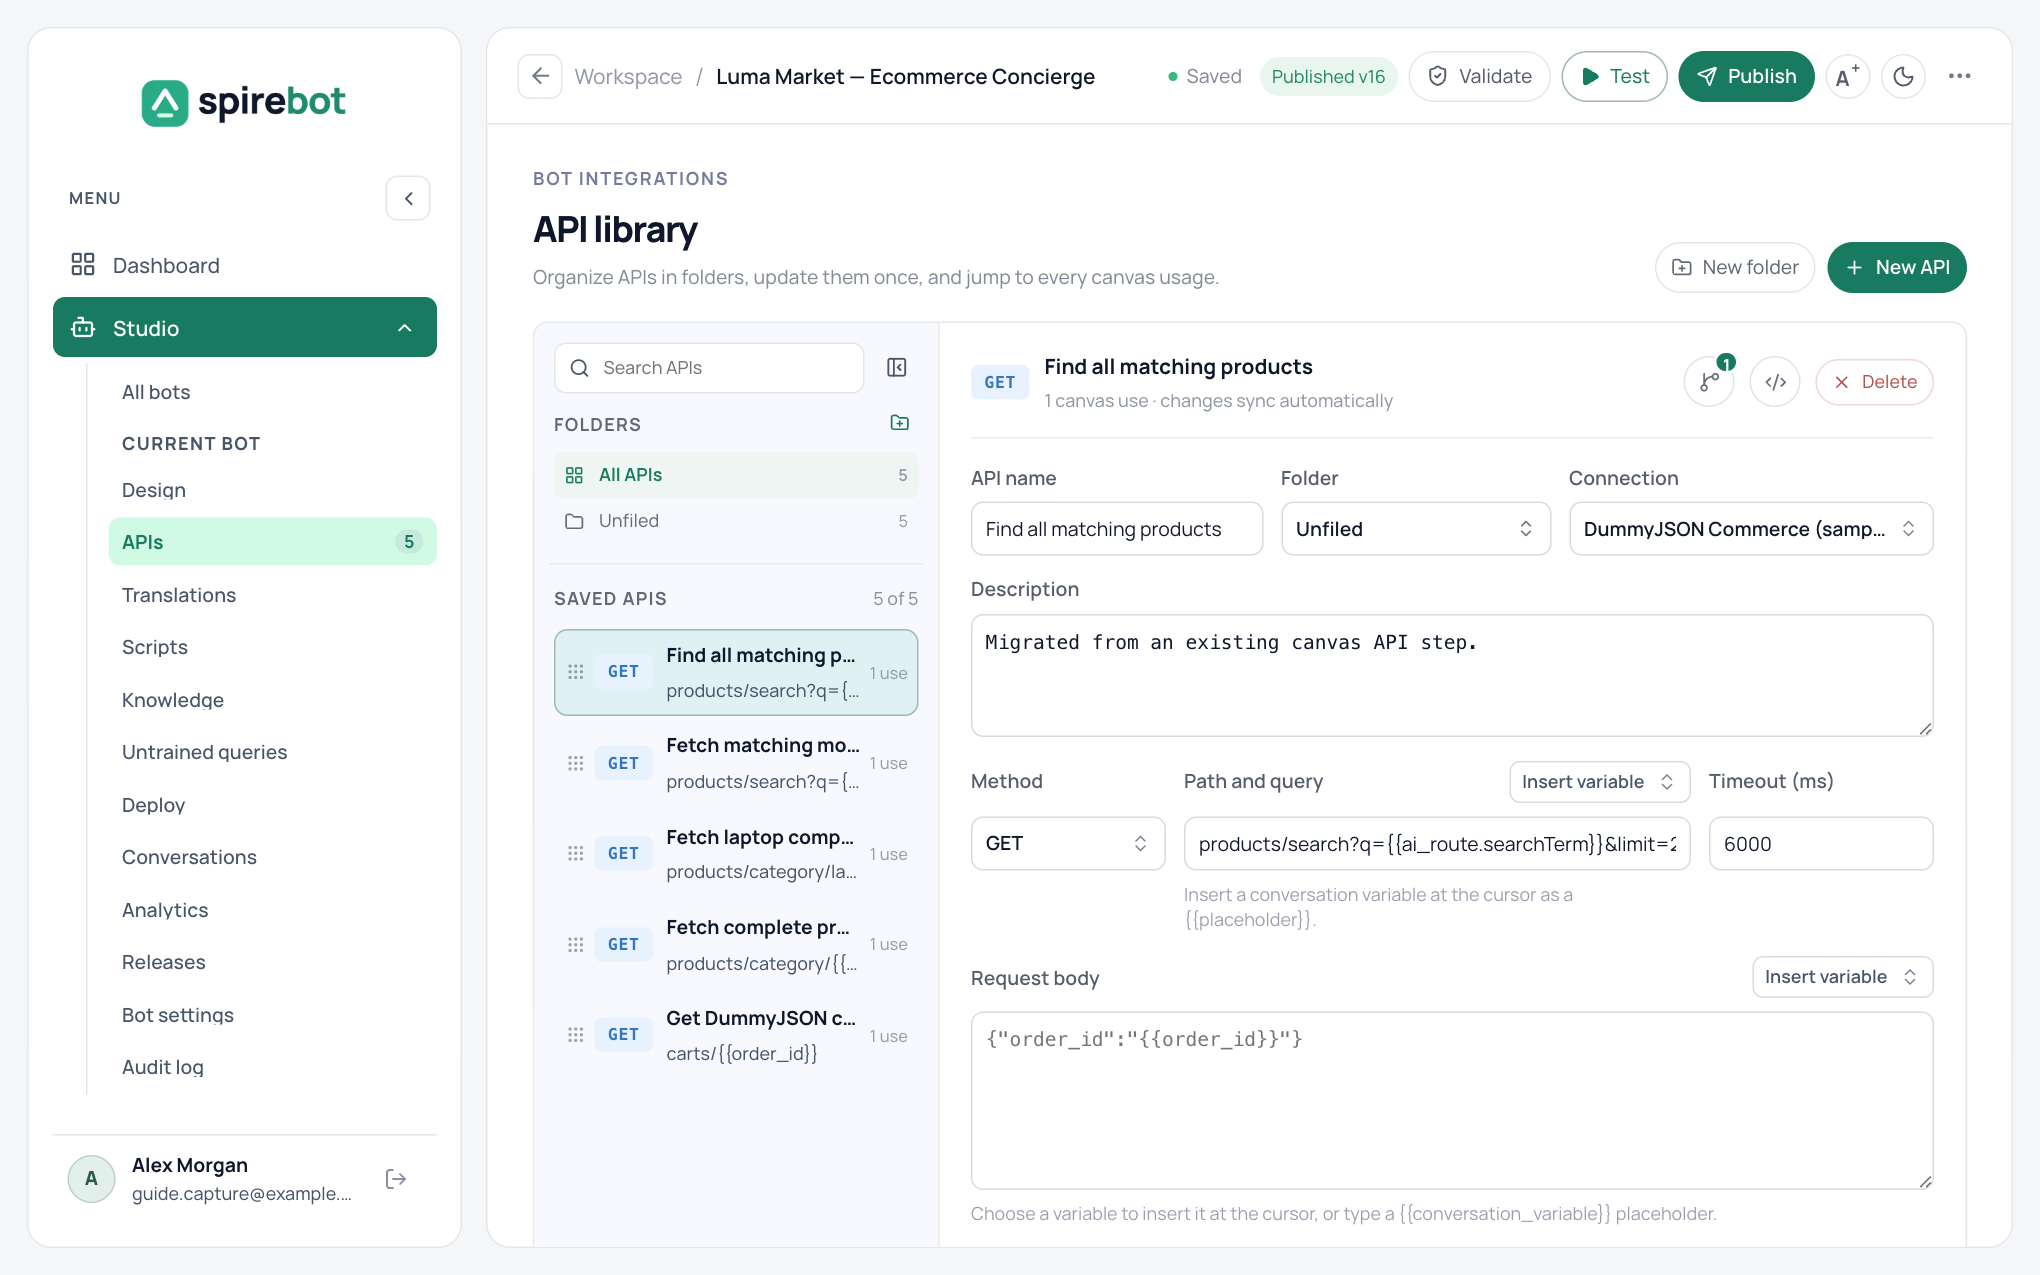
Define each request once in the bot’s APIs section, then pick it in any API Call step. Changing a saved API updates every step that uses it.
- Open APIs in the bot menu and select New API.
- Enter a name, choose a folder, and choose the connection.
- Set the method, the path and query, the timeout, and, if needed, the request body and headers. Use Insert variable to add conversation values.
- Test the API with sample values. Check the status and the shape of the response.
- In the flow, add an API Call step, select the saved API, and connect both its Success and Failure branches.
- New folder groups related requests.
- Import from cURL: paste a cURL command to fill in a request. Credentials and secret headers are left out on purpose; add them to the workspace connection.
- Map only the response fields the conversation needs.
Creating, changing, and testing saved APIs needs the API Integrator or Administrator role. Bot Designers can open the library and use any saved API in an API Call step, but cannot change it. An assistant proposal that adds or changes an API is also refused for a Bot Designer.
Scripts
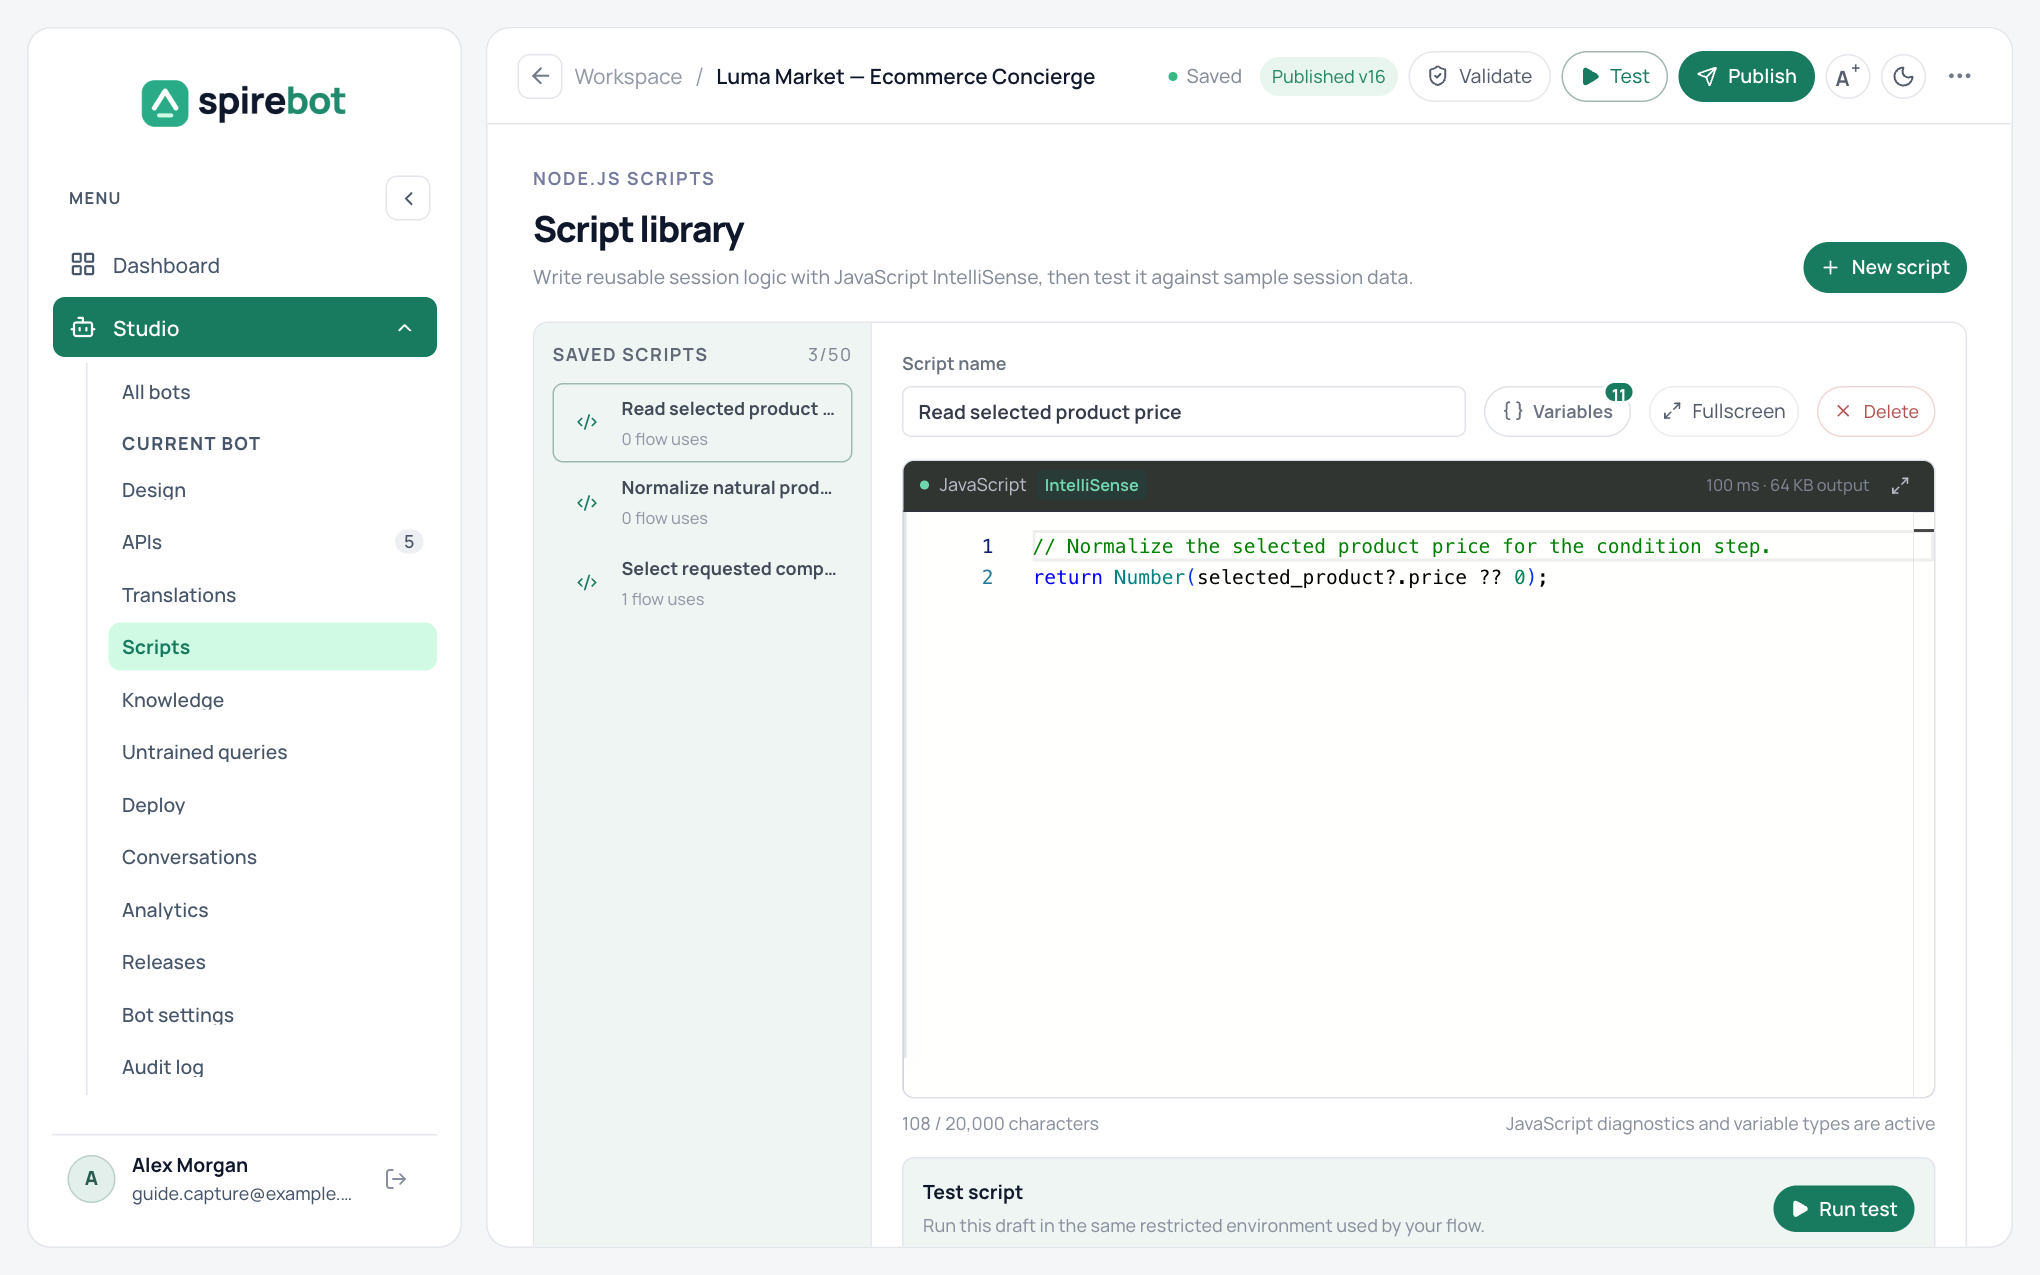
A script transforms data inside a flow, for example picking one value out of an API response. Open Scripts in the bot menu, select New script, and write JavaScript in the editor. Then use it in a Run Script step.
- The Variables button lists the conversation variables you can read.
- Under Test script, enter sample variables as JSON and select Run test to see the output.
- Keep scripts small and predictable. Scripts cannot use the network, files, modules, environment variables, dynamic code, or asynchronous work.
Knowledge sources
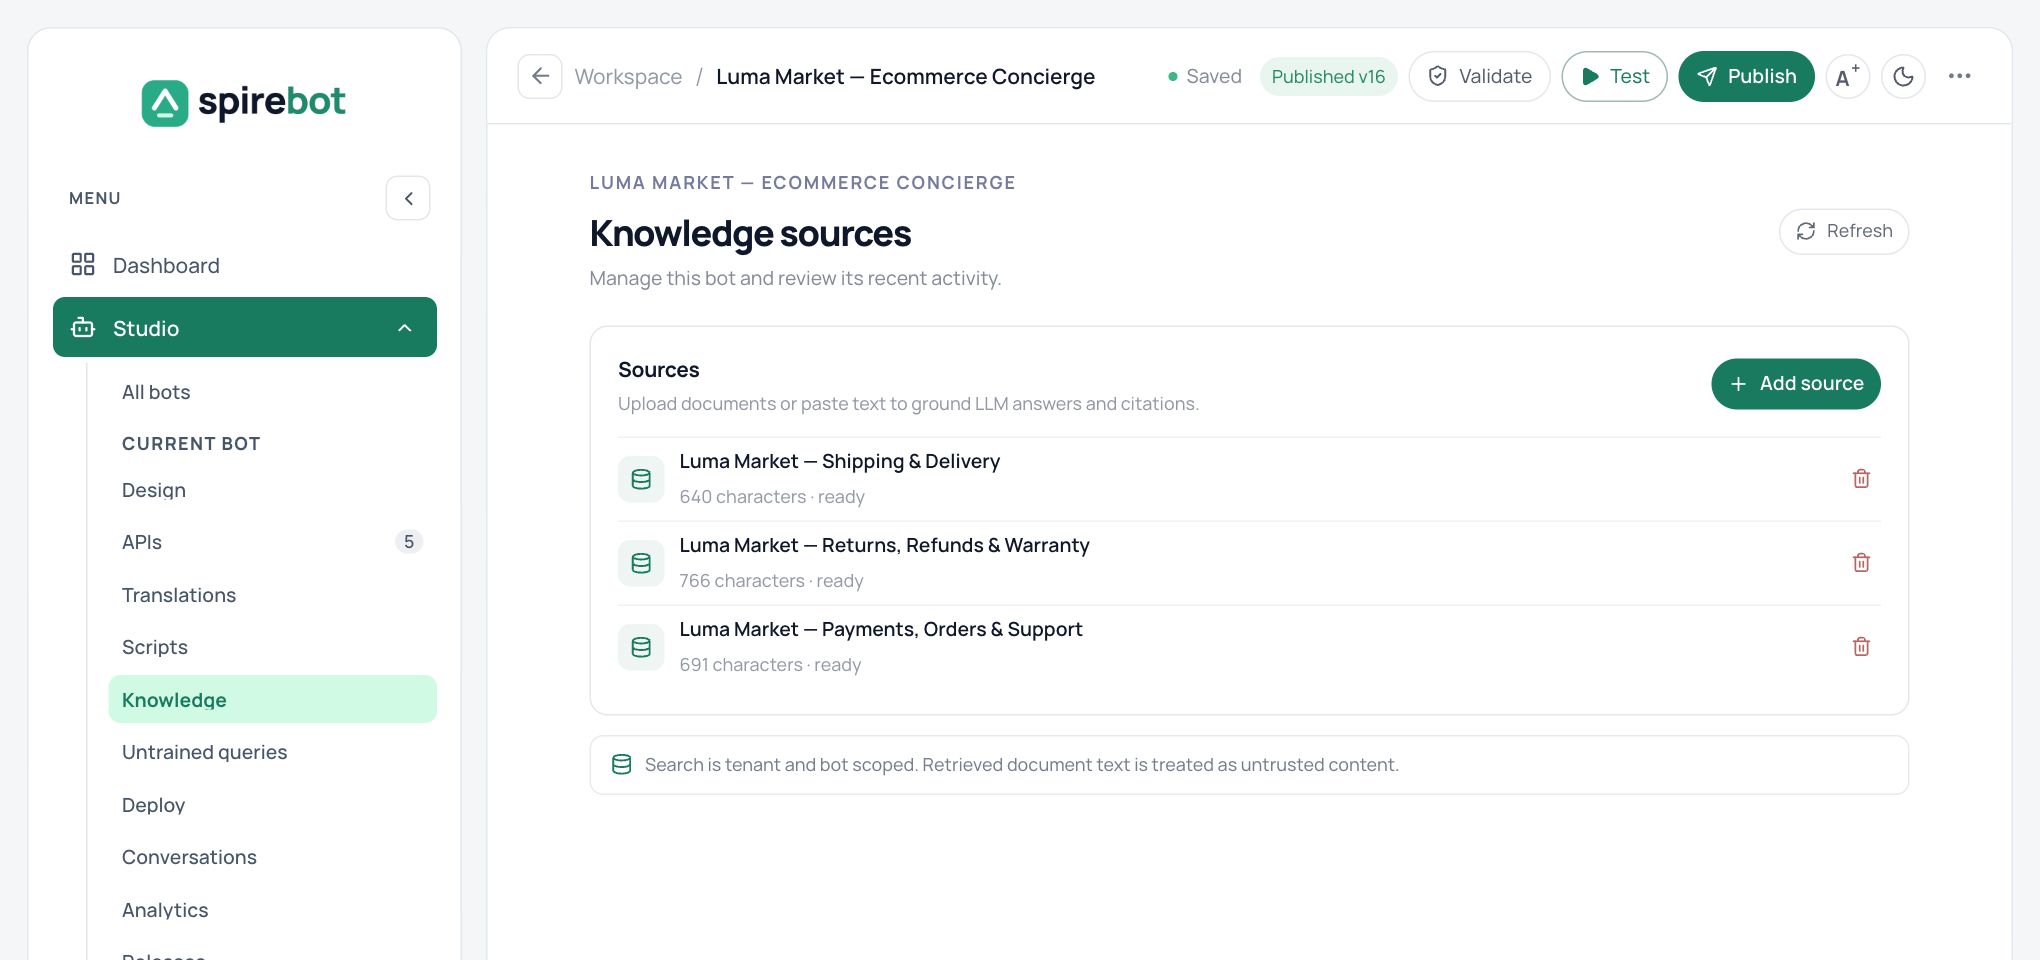
Knowledge sources are the documents the bot answers from in a Knowledge step.
- Open Knowledge in the bot menu and select Add source.
- Upload a document or paste text, and give it a clear title.
- Wait until the source shows as ready.
- Upload focused, current documents. Separate policies by audience, region, or product when needed.
- Write a guarded response for the case where no reliable answer is found.
- Test questions that are answered, ambiguous, and out of scope.
- Replace or remove out-of-date sources as part of content review.
Translations
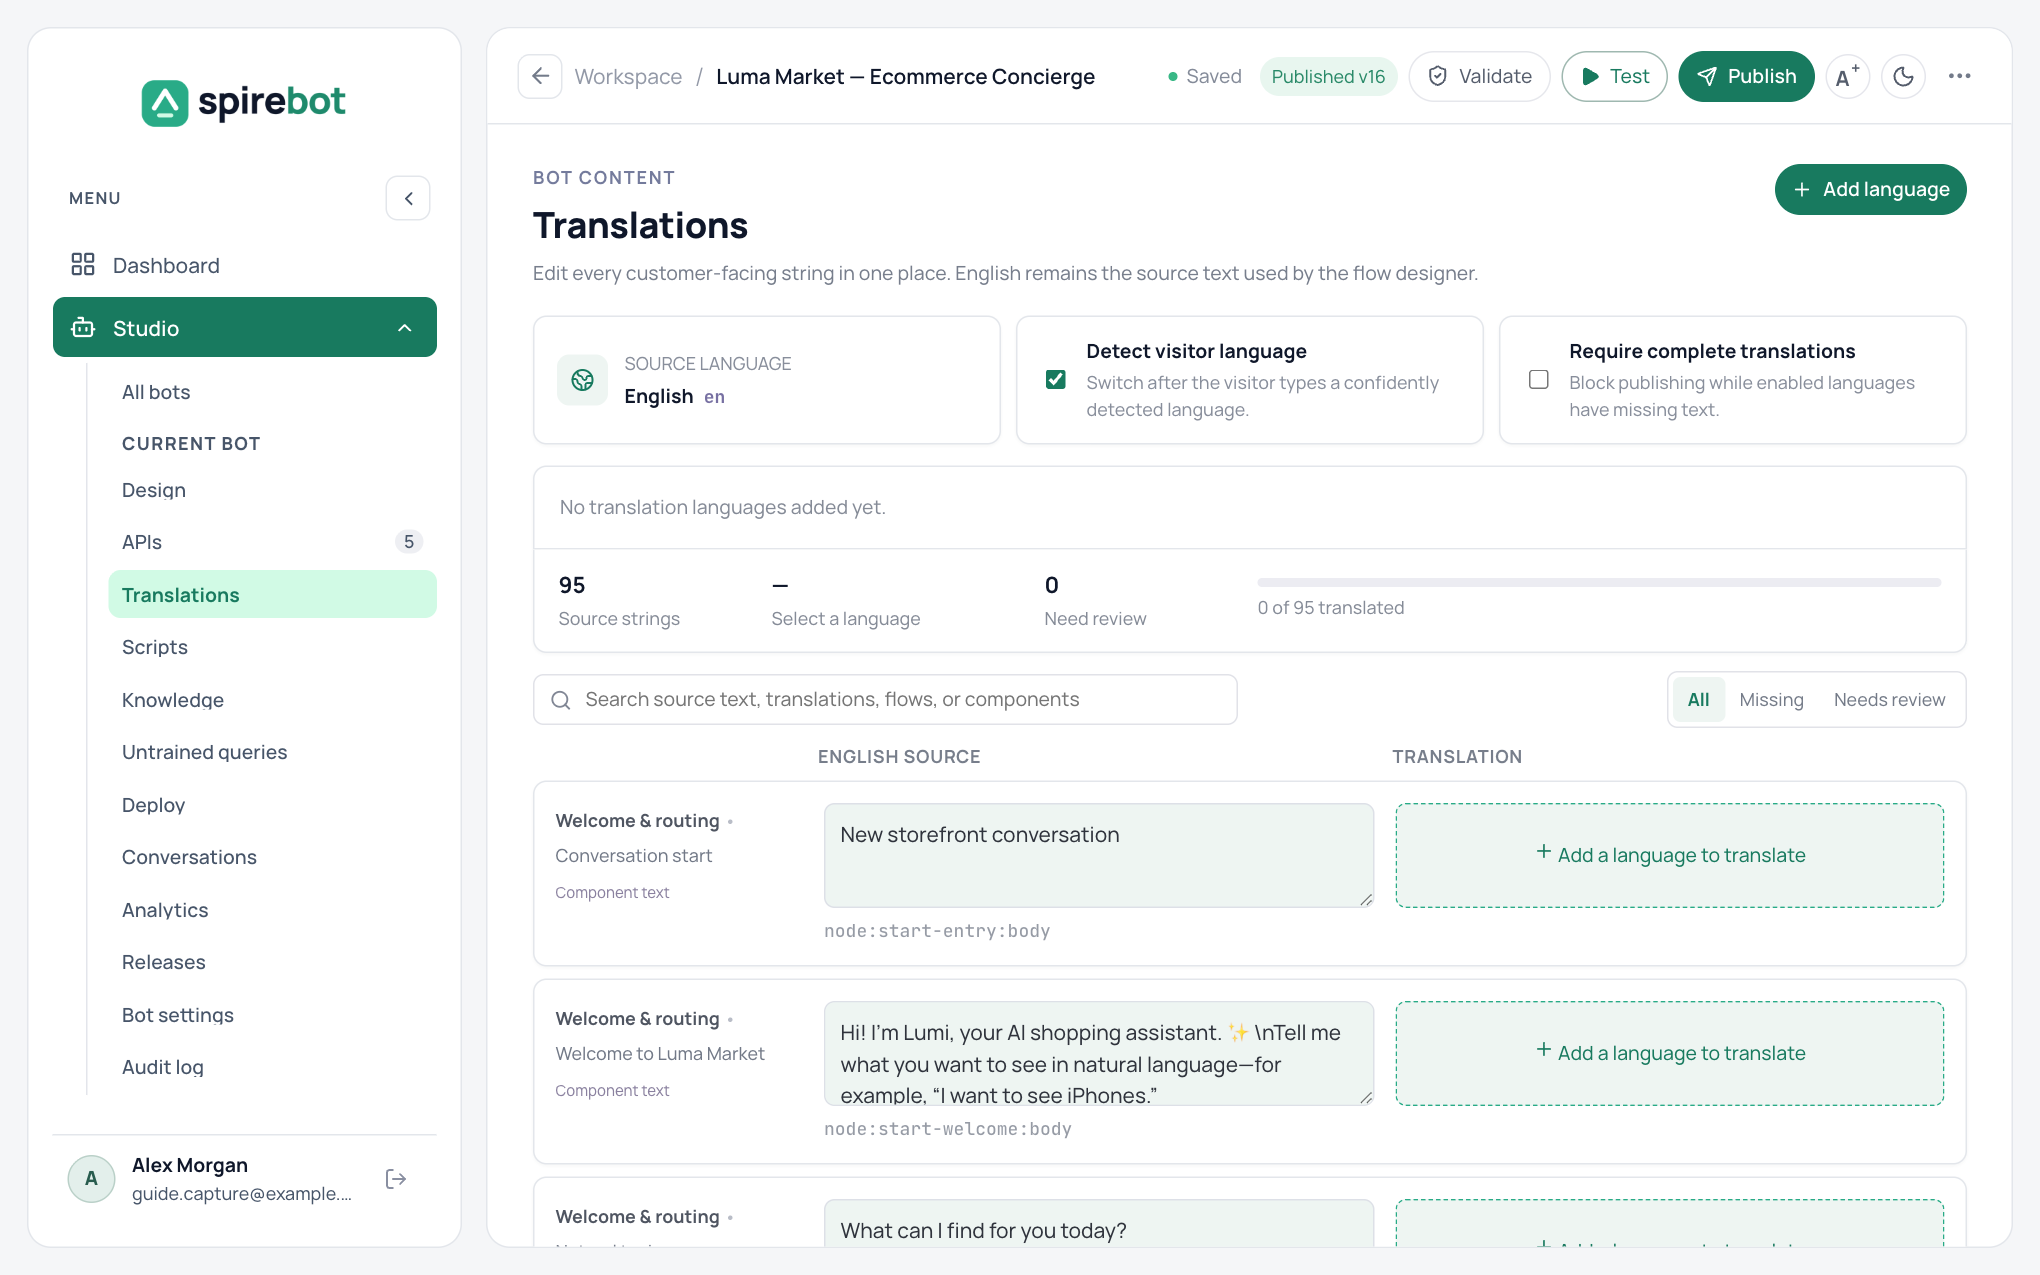
The Translations section lists every customer-facing text in the bot. The source language stays the text you see in the designer.
- Select Add language and choose the language.
- Enter the translation beside each source text. Use the search box, or the Missing and Needs review filters, to find what is left.
- Keep every
{{variable}}placeholder unchanged in the translation.
- Detect language switches the conversation to the customer’s language once it is recognised with confidence.
- Require complete translations blocks publishing while an enabled language has missing text.